
The magic ring, also known as the magic circle, is a common technique for starting an amigurumi. Amigurumi aren’t started with a long starting chain because they’re worked in the round. There are a few different ways to begin crocheting in the round, but the magic ring is, in my opinion, the best method! It’s easy to close the magic ring, and it won’t leave a hole that stuffing can come out of. Additionally, once you’ve mastered the magic ring, you’ll be able to make it as fast as you would a slip knot.
Amigurumi aren’t the only crochet project that’s worked in the round. For example, hats, bags, doilies, and coasters are all crocheted in the round. The magic ring can be used in all of these projects, and is a fantastic technique that can improve your crocheting.
Making the Ring
Hold out your left hand with your palm facing you. Drape your yarn across your fingers, where your first knuckles are, and pinch it between your thumb and ring finger.
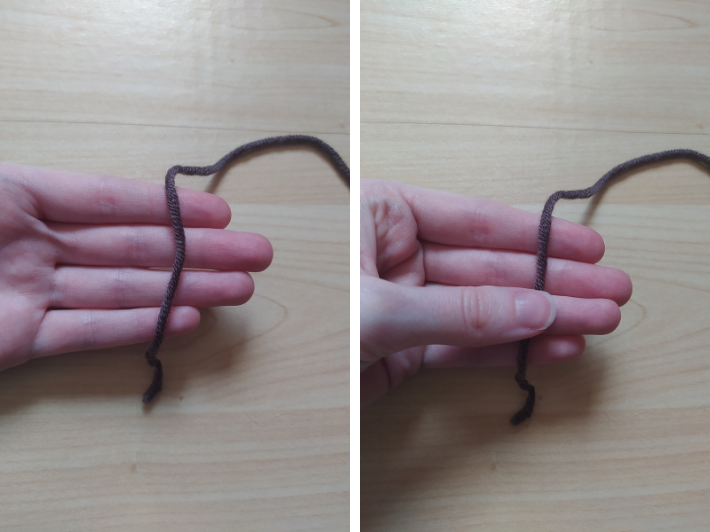
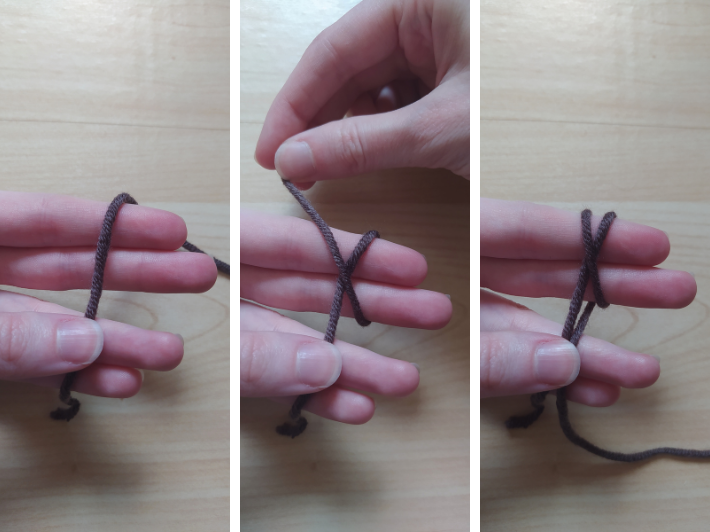
Move your fingers to make a gap between your middle and ring finger. With your right hand, grab the yarn strand that’s behind your left hand and attached to the yarn ball. Wrap your yarn loosely around your pointer and middle finger from back to front, overlapping the other strand of yarn and making an “X”. Then, tuck that strand of yarn between your thumb and ring finger alongside the yarn tail.
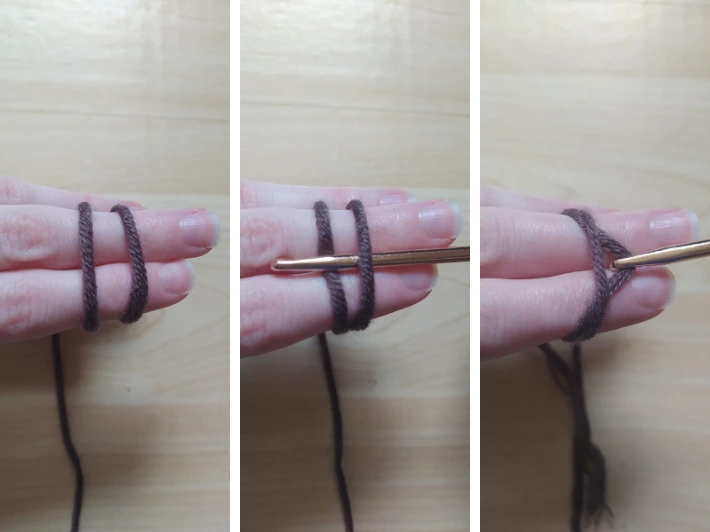
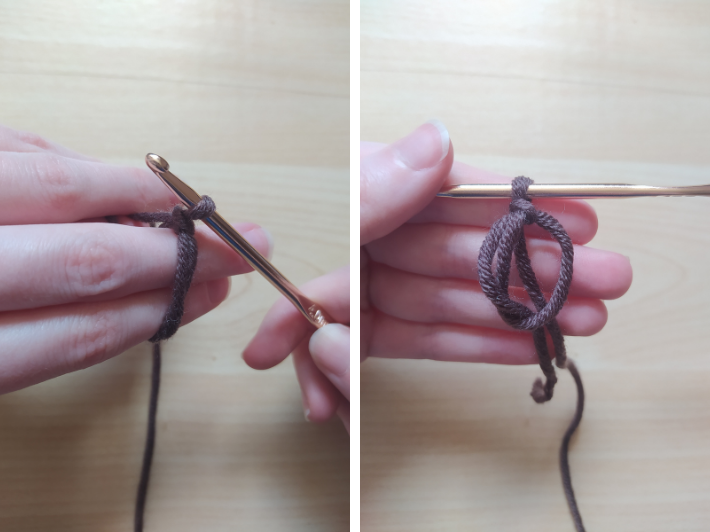
Turn your hand over, so the tops of your fingers are facing you. There should be two loops of yarn on your fingers. Slide your crochet hook underneath the right loop, hook over the left loop, and pull the left loop under the right loop.
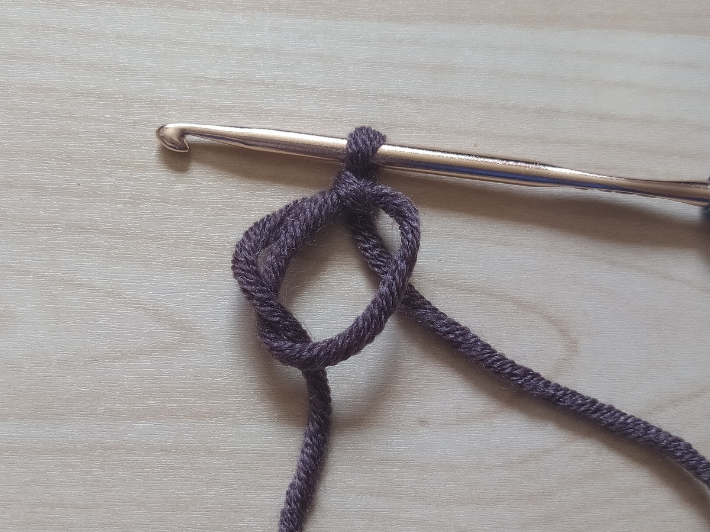
Twist your hook towards you and then upwards, so that you have a loop around your crochet hook. Move your crochet hook to the right, over your middle finger. You should see a strand of yarn running from the loop on your middle and pointer fingers to where it is pinched between your thumb and ring finger.

Yarn over and pull that strand through the loop on your hook. You have made a chain and secured the magic ring. Let go of the strands of yarn you had pinched between your thumb and ring finger, and gently slide the magic ring off of your middle and pointer fingers. Keep the loop that’s on your crochet hook where it is. You have successfully made a magic ring!
Working Stitches in the Ring
Now that you have made your magic ring, you can work your first row of stitches. You start crocheting like you would a regular row, chaining 1 for a single crochet, chaining 3 for a double crochet, etc. The chain you made to secure the magic ring does count as 1 chain.
Crocheting in the magic ring isn’t very different from crocheting in a starting chain. Actually, the magic ring is kind of like one big chain that you work all of your stitches in. One thing to note is you need to crochet over two strands of yarn: the ring itself and the yarn tail. To make a single crochet, insert your hook in the middle of your magic ring, yarn over, and pull up a loop. Yarn over and pull through both loops on your hook. Repeat until you have the required amount of stitches.

I recommend marking your first stitch with a stitch marker. After you make a couple of stitches, you can pull the tail end to make the ring a little smaller and easier to work in, but be careful that you still have room for the rest of your stitches. Your pattern should tell you whether you work in a continuous spiral or if you slip stitch at the end of each round.
Closing and Securing the Magic Ring
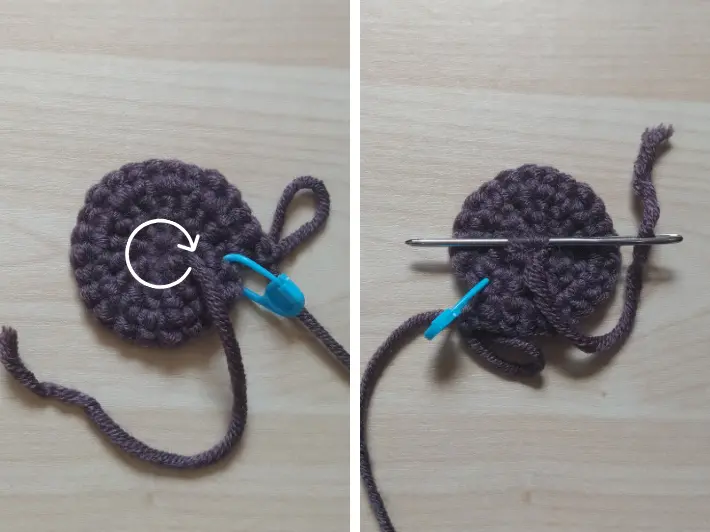
Once you have finished your first row, close the magic ring. Pull your yarn tail until the ring is mostly closed and there is no gap between your first and last stitch. Before I secure my magic ring, I crochet another couple of rows so that I have more room to hold onto my project. If you’d like to secure the ring after your first row, that’s fine too. There are two ways to secure a magic ring.
The first method is simply weaving in the yarn tail. First, make sure the magic ring is tightly closed. Insert the tail into a yarn needle. Slide the needle in the middle of your first row of stitches, work in a circle until you’re back where you started, and pull the needle and tail through. Then, weave in your tail in the opposite direction, in the stitches you have already weaved through. Skip one stitch before going in the opposite direction for the yarn to catch on. Cut any excess yarn.
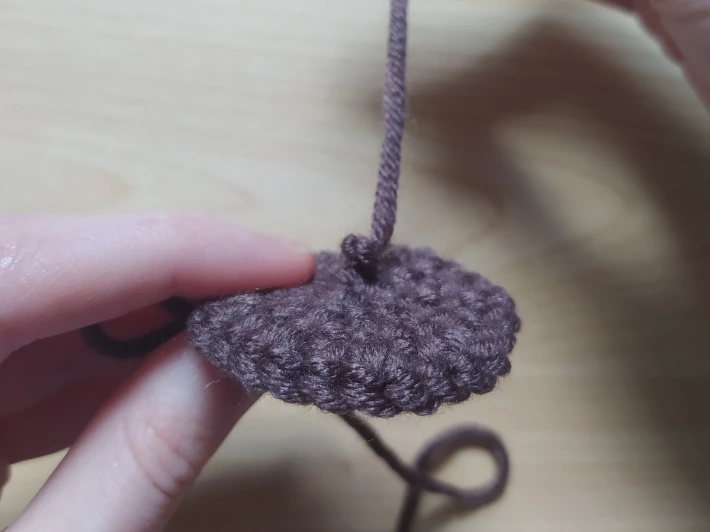
The second option is best for amigurumi. Make sure the magic ring is tightly closed. Then, tie a double knot as low as you can on the tail. There’s no need to trim the tail or weave it in, as it will be enclosed inside your project.
I hope this tutorial helped you successfully make a magic ring! Please tell me if you found any of the instructions confusing, either in the comments below, or you can email me directly at calista@yarninateacup.com. If you want to learn more amigurumi techniques, check out Amigurumi Basics: How to Crochet Increases and Decreases, and find an amazing pattern in 8 Small and Easy Amigurumi Patterns Perfect for Beginners.