
The long tail cast on is a great cast on that’s ideal for most projects. It’s quick and easy to do once you get the hang of it, and it produces a nice, clean edge. The way this cast on works is the working yarn (the strand that leads to the yarn skein) is used to create the loops on your needle, the ones you work into. The yarn tail is wrapped around those loops and anchors them.
Some knitters consider the long tail cast on to be an advanced beginner cast on. I partially agree, because other cast ons are simpler, and this cast on can be frustrating, especially if you make your tail end too short. However, this was the first cast on I learned when I started knitting, so I know firsthand that a complete beginner can master the long tail cast on.
This tutorial has clear, to the point instructions, and plenty of pictures to make the long tail cast on as easy to learn as possible. Ultimately, it’s up to you whether you think you are ready to try the long tail cast on. If you want to learn an easier cast on, I recommend the backwards loop cast on.
How Long Should the Yarn Tail Be?
As the name suggests, the long tail cast on requires a long tail of yarn. When you are learning how to cast on, you should practice the cast on method first. Don’t worry about casting on a certain amount of stitches for a project until you have the basics down. A good 18 inch tail is long enough to practice with.
When you’re ready to use the long tail cast on for a project, it’s important to have a long enough tail. If it’s too short, you’ll have to undo your cast on and start all over again with a longer tail. Estimating the amount of yarn takes a few steps, so I have an entire article about estimating the tail for a long tail cast on here.
How to Hold the Yarn
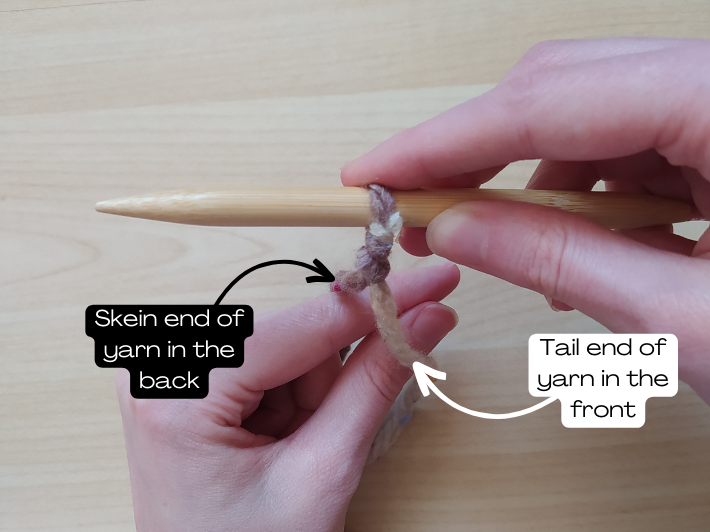
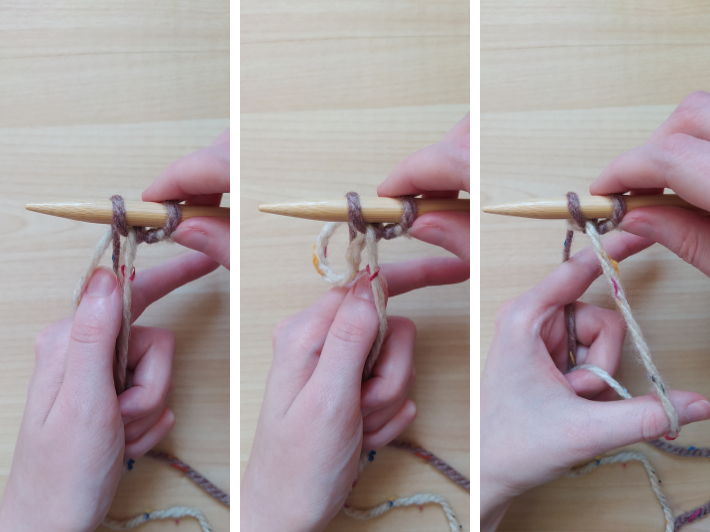
First, make a slip knot and place it on your needle. If you don’t know how to make a slip knot, I have a tutorial here. The yarn tail should be in the front, and the yarn leading to your yarn skein should be in the back. With your right hand, hold the needle securely, and place your pointer finger on top of the slip knot to keep it in place. You can use your thumb instead if that’s more comfortable. Separate the two yarn strands with the thumb and pointer finger of your left hand. Again, the yarn tail should be in front, resting on your thumb, and the yarn that leads to the skein should be in back, resting on your pointer finger.
I tied two different colored yarns together for these pictures to make it super clear which yarn strand I use in each step. The cream color yarn is the tail end of the yarn, and the brown yarn is the working yarn that leads to the yarn skein.
Grab both strands with your other 3 fingers to keep them in place, keeping your thumb and pointer finger in between the two strands. Your grip on the yarn should be light enough that the strands easily move through your fingers.
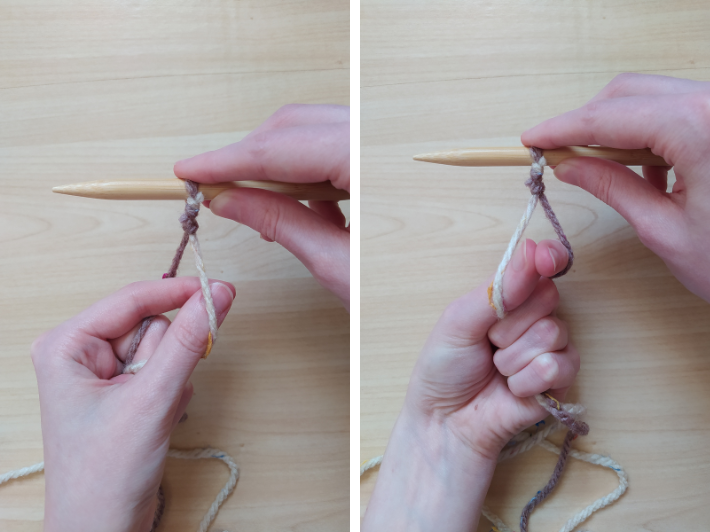
Bring your thumb out towards you. Then move your thumb upright, until the first knuckle of your thumb is against the third knuckle of your pointer finger. The yarn should go from the needle, around the top of your thumb, and down to where your fingers are holding both strands. There should be some tension on the yarn, but it shouldn’t be super tight against your fingers.

The back strand of yarn should rest against the top of your pointer finger and down to where your fingers are gripping both strands of yarn. The position of the needle doesn’t matter at this point, just make sure to keep the slip knot in place.
How to Cast On Stitches
When you cast on stitches, you want to make sure they’re not too tight, or else you won’t be able to work into them. On the other hand, if they’re too loose, you’ll have trouble keeping them on your needle. Just pay attention to this when you’re casting on, and practice until your cast on is at a tension that works for you.
To cast on a stitch, bring your needle down to your middle finger of your left hand. Insert your needle under the yarn that’s on top of your thumb, and bring the needle upright, parallel to your thumb. This will create a wide loop between your thumb and your knitting needle.
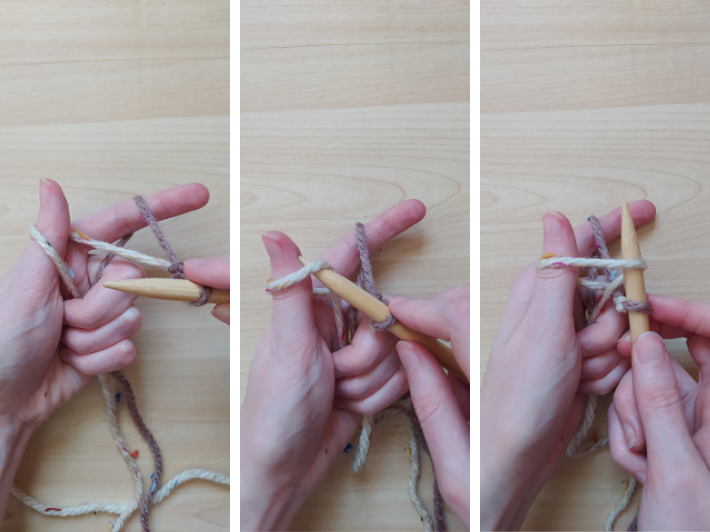
Slip your needle under the yarn that’s in front of your pointer finger from right to left. Then, move your needle towards yourself, through the loop that’s around your thumb and needle, and past your thumb. The needle should end up being close to horizontal.
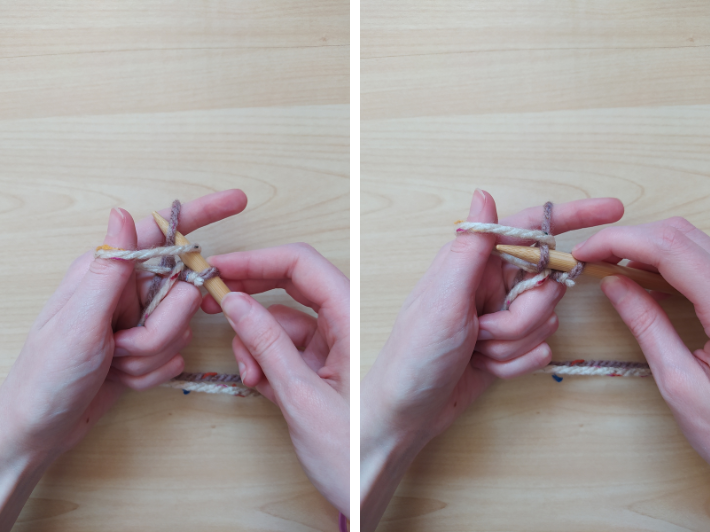
Now, it’s time to take your thumb out of the loop that you’ve made with the tail yarn. Bring your needle upwards and the loop that’s on your thumb will begin to slide off. Then, move your thumb to the right, catching the yarn where it goes from your needle down to where you’re holding it with your other 3 fingers. Pulling it will tighten the loop you have just made on the underside of your needle. You have cast on one stitch!
Move your hand upright to the position you were in when you started casting on stitches. Repeat each step until you have cast on the required amount of stitches. At first, you may have to take your fingers out of the yarn completely and start over from the beginning after each stitch. Once you get used to the motions, you should be able to cast on stitches without pause.
I hope this tutorial helped you! Follow Yarn in a Teacup on Facebook to stay up to date with new tutorials and other articles. If you have any questions about the long tail cast on, comment down below and I will answer them.