
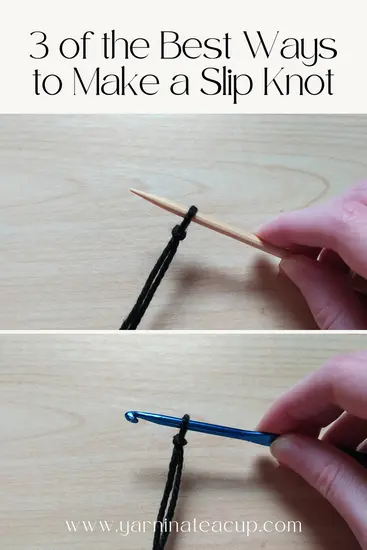
A slip knot is the one of the first techniques you learn when starting to knit and crochet. It’s a very simple knot that creates an adjustable loop. Many crochet and knitting projects begin with a slip knot, so it’s important to find a slip knot method that you like. All of these methods are quick and easy to remember. The first two methods use your fingers to create a slip knot, and the last one uses your crochet hook or knitting needle.
Before we get into the different slip knot methods, there are two things you need to know. Firstly, how long the tail of your yarn needs to be. You’ll need to be able to weave in the yarn tail once you’ve finished your project. A good length is 5-6 inches. That will give you enough yarn to weave in the tail securely.
Secondly, slip knots can be made so that either the yarn tail or the yarn that leads to the yarn skein tightens the loop of the slip knot. It’s mostly personal preference as to which one you use. In knitting, it depends on which cast on you use. For the long tail cast on, there isn’t any difference no matter which strand of yarn tightens the loop. In crochet, when you use a slip knot that tightens with the yarn tail, you can tighten the slip knot, so there’s no gap between it and the stitch above. When you work in a slip knot that tightens with the yarn that leads to the yarn skein, there’s no way to tighten the slip knot after it’s off of your hook.
My Favorite Method: The One Finger Slip Knot
I like this method because it’s super quick, and it’s easier to tell how long of a tail you’ll end up with than the other methods. The loop tightens when you pull on the tail end of the yarn, which I prefer.
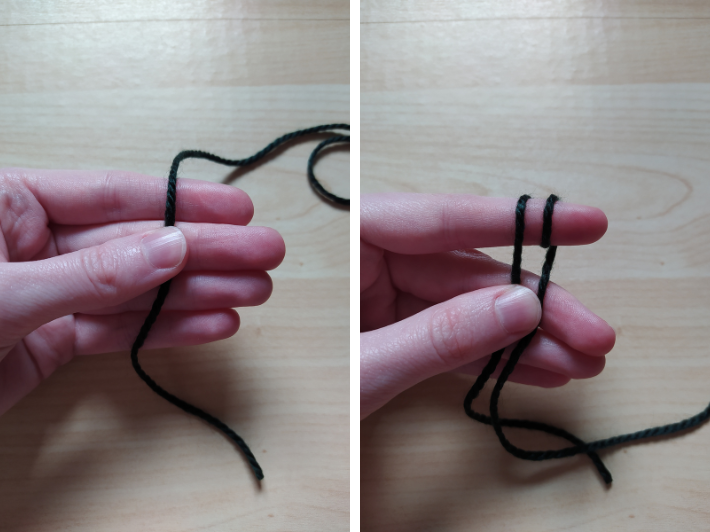
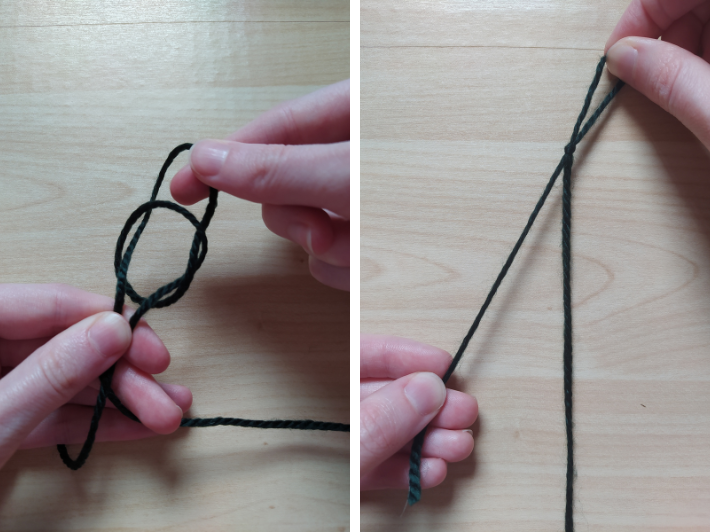
To make a slip knot using the one finger method, start by pinching the tail end of the yarn in between your thumb and middle finger. Wrap the other end of the yarn around your pointer finger twice. Pinch both yarn strands between your thumb and middle finger so that they’re secure.
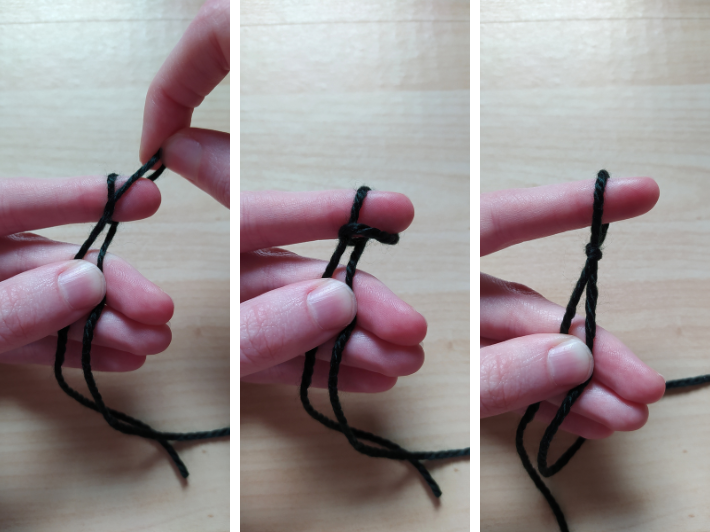
Pull the left loop over the right loop, but keep it on your finger.

Pull the new left loop over and off your finger. Move your pointer finger upwards to form the slip knot, or pull the both of the strands of yarn you have secured between your thumb and middle finger down. Don’t pull the knot too tightly, as that will make it hard to change the size of the loop.
Move the slip knot to your crochet hook or knitting needle, and pull on the yarn tail to tighten the loop as needed. If you need a bigger loop, pull on the yarn that leads to the yarn skein.
Two Finger Slip Knot Method
This slip knot method is perhaps the easiest one. It’s basically two steps: wrapping the yarn around your fingers, and pulling up a loop. The yarn strand that leads to the skein is pulled to tighten the loop.
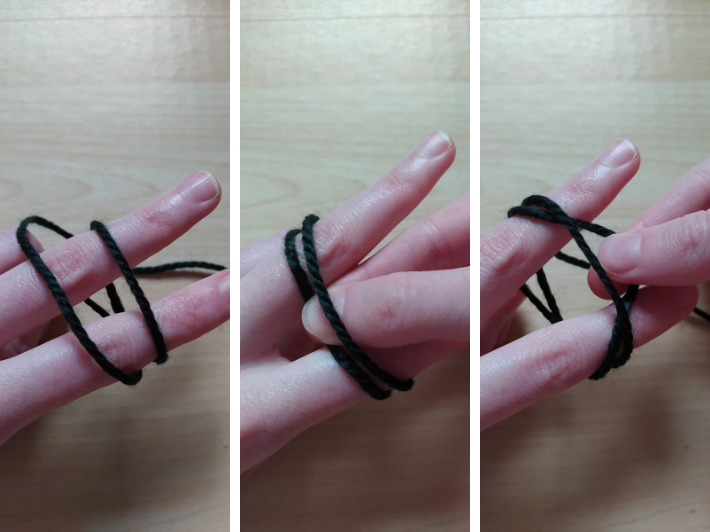
Hold the yarn between your thumb and ring finger. Wrap your yarn in a loop around your pointer and middle fingers. Place the yarn leading to the skein across your fingers.

Spread the two fingers apart, reach in between them with your thumb and pointer finger of your other hand. Grab the yarn that leads to the skein. Pull it through the loop on your fingers.
Take the whole thing off of your fingers, keeping a hold of the loop you’ve made with your right hand. Pull the tail end down until the knot is secure, but not too tight.
Move the slip knot to your crochet hook or knitting needle, and pull on the skein end of the yarn to tighten the loop as needed. If you need a bigger loop, pull on the yarn tail.
Crochet Hook or Knitting Needle Slip Knot Method
When researching different methods to make slip knots, I looked for one that could be created using both a crochet hook and a knitting needle. I didn’t find anything, so I came up with this method myself. There are only so many different ways to make a slip knot, so I can’t guarantee no one has thought of this method before, but until I find someone who has, I’m claiming it as my own. This method is just as quick as the other two, but the best part about it is that it’s created on your hook/needle.
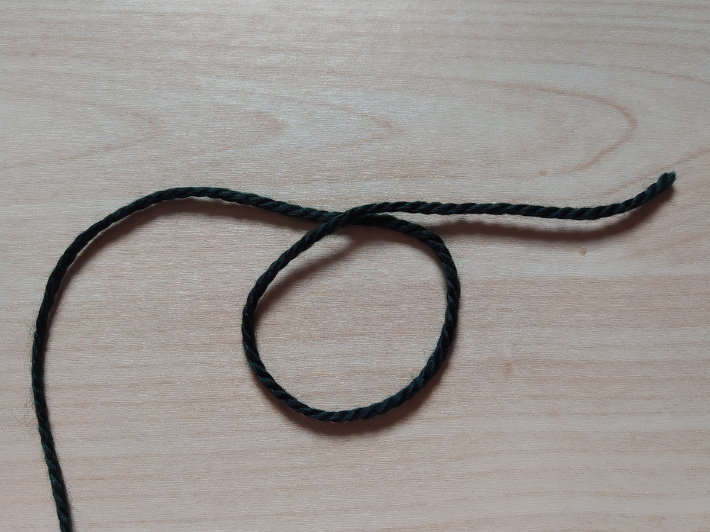
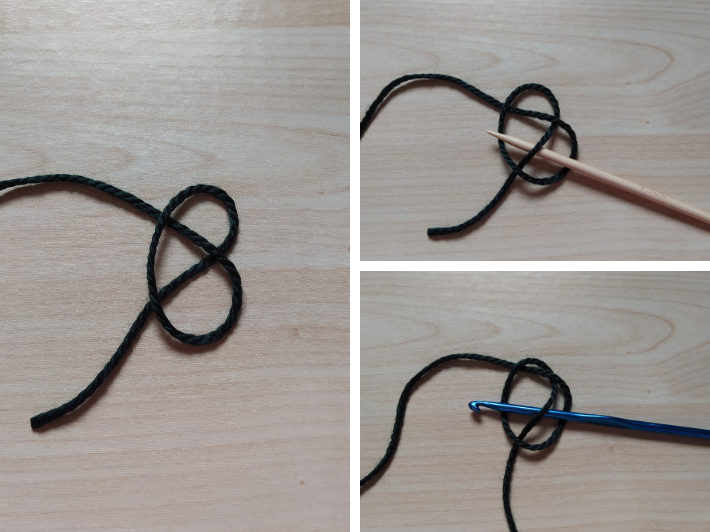
Start by holding the yarn with the skein end on your left, and the tail end on your right. Then, make a loop with the tail end on top.
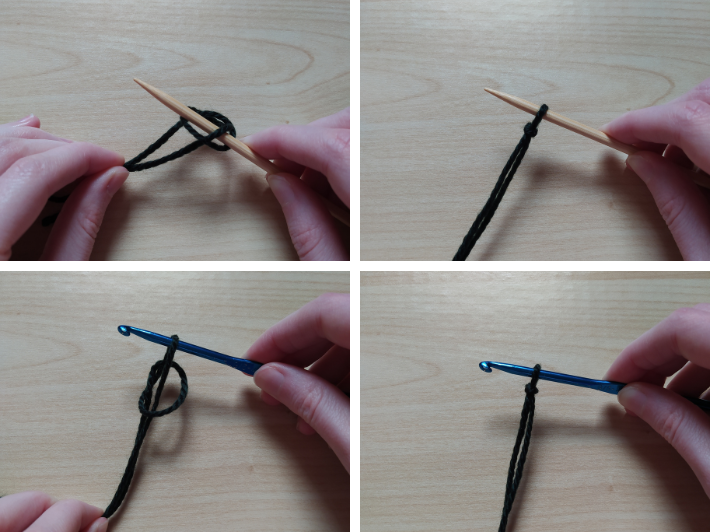
Put the tail end under the loop you just made. Place your crochet hook or knitting needle under the yarn tail, but keep it on top of the loop.
Grab both yarn ends and pull both strands of yarn until a knot forms, not pulling the knot too tight. Pull on the yarn tail to tighten the loop of the slip knot, and the skein end to loosen it.
I hope this article helped you! Follow Yarn in a Teacup on Facebook to stay up to date with new articles. Comment down below which slip knot method is your favorite!